Why would you sterilize soil?
Taking the precaution to sterilize soil can kill off insect eggs, fungi, and bacteria that could potentially cause harm to your plants.
In my previous post, why-all-of-my-succulents-almost-died-and-what-i-did-to-save-them, I discussed needing to re-pot my plants because of over-watering, root rot, and an infestation of mealybugs. I didn’t want to run into the same problems with bugs and bacteria. This time, I decided to sterilize the soil first.
If you were potting some plants and ran out of fresh dirt, you can sterilize the old soil to make sure no contaminants are living in it before reusing. Because I was weary over my recent bout with pests, I was using a fresh new bag of Miracle-Gro cactus and citrus mix the when I decided to try soil sterilization, but you can also use this method to freshen up old soil before re-potting.
Okay, so how do you sterilize soil?
Basically, you’re making it so hot that no contaminants can survive. The best way to sterilize soil at home is by steaming it in the oven or on a grill. Steam sterilization is also popular in commercial farming and greenhouses, but they have a better method for doing it on such a large scale. You’ll accomplish this by adding a little water and some heat.
Sterilizing soil
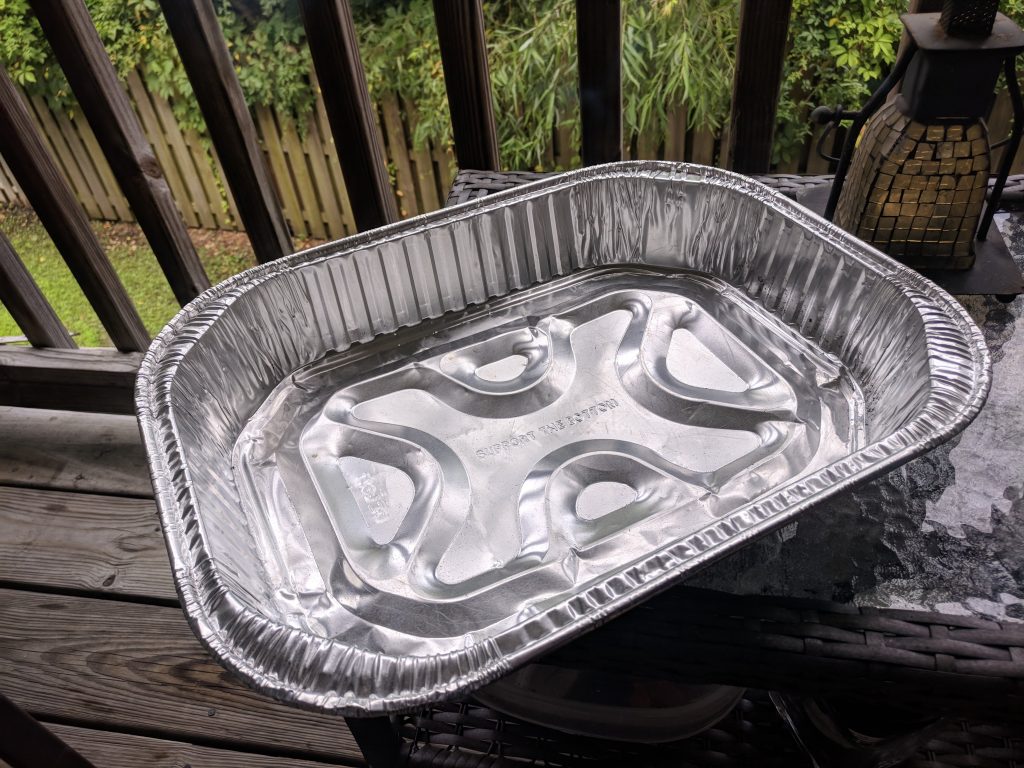
- Get a pan.
Use a big pan that you don’t mind getting dirty. I used a disposable foil pan.
- Get some dirt.
Get your soil. I used miracle grow cactus, palm, and citrus mix, but this will work with regular potting soils too.
- Pour dirt into the pan.
Put some soil in the pan, filling to a depth of about 3 or 4 inches.
- Make sure there’s some moisture in there.
If you are starting with potting soil that feels pretty damp, you’re good to go. If not, add some water—just a little we’re not making mud pies—and mix it up a bit
- Cover with foil.
An aluminum foil cover traps the steam in with the soil. It can make the baking time take longer, but is more effective.
- In the oven, bake at 200°F for an hour or until the soil temperature reaches 180°F.
We’re not going for scorched-earth here. Too high of a temperature can destroy good organic matter like bark and make it lose it’s nutrients. It could also release carcinogens from burning them.
- Enjoy the aroma.
It is going to smell a little earthy as the steam exits your oven, so if you have a grill you might want to try this outside.
Have you tried this, or do you know of any other methods you’d recommend for sterilizing soil? Please let me know how it goes in the comments below.
4 replies on “How to Sterilize Soil”
So ur saying you also would also sterilize your new store bought dirt?
I have. I did when I freaked out about the mealybugs. I don’t think it’s necessary all the time, but depending on how it was stored it could be beneficial .
There is a simpler way to sterilize soil in the oven. There is an old boy scout gag in which older boys put a paper cup full of water directly into the camp fire flames and asks the novitiate how long before the cup burns. The correct answer is not until all the water evaporates. The liquid keeps the cup from getting over 212 degrees. No need for oven proof containers. Similarly there is no need to keep the oven temp low. Just make sure,the soil is well hydrated. This principle is applicable to sterilizing soil in the oven. I sterilize eight one gallon ordinary plastic flower pots from the nursery in the oven at a time. That’s about a cubic foot. At 400 degrees it takes about 45 minutes to reach 180-185 degrees. Take the pots out then, with hot pad of course, and set on the counter. Just like a turkey it takes over thirty minutes for the temp to fall to 160. There is no need for foil either. The very top of the pots can dry out, so put a wet paper towel over them or a bit of wet rag that you can wash and reuse. Happy gardening.
I was skeptical of this claim, but found some YouTube videos of people boiling water in paper cups proving that this could in fact work. They charred on the outside but didn’t burn all the way through or catch fire. There’s still the potential for parts of plastic pots to melt though, so I’ll just keep playing it safe with the foil pans. Everything else was very helpful. Thanks for the tips.